
DIY Textured Styling Backdrop
We started off this backdrop styling series last week with a white wood option, and for our second surface, we're using a new set of supplies from The Home Depot Canada to create a textured backdrop using drywall spackling.
With a beautiful textured surface that you can customize to your liking and the opportunity to play with a colour palette of your choosing, this backdrop is a nice alternative to a solid coloured background that still gives you the opportunity to infuse a signature colour into your content. The texture creates a subtle, natural effect that is perfect for flatlays or those coveted detail shots that help tell a story.
For this DIY, we've also created a video so you can see the project in action, making it a little easier to see all the nuances without having to include a million step-by-step photos showing each and every brush stroke.
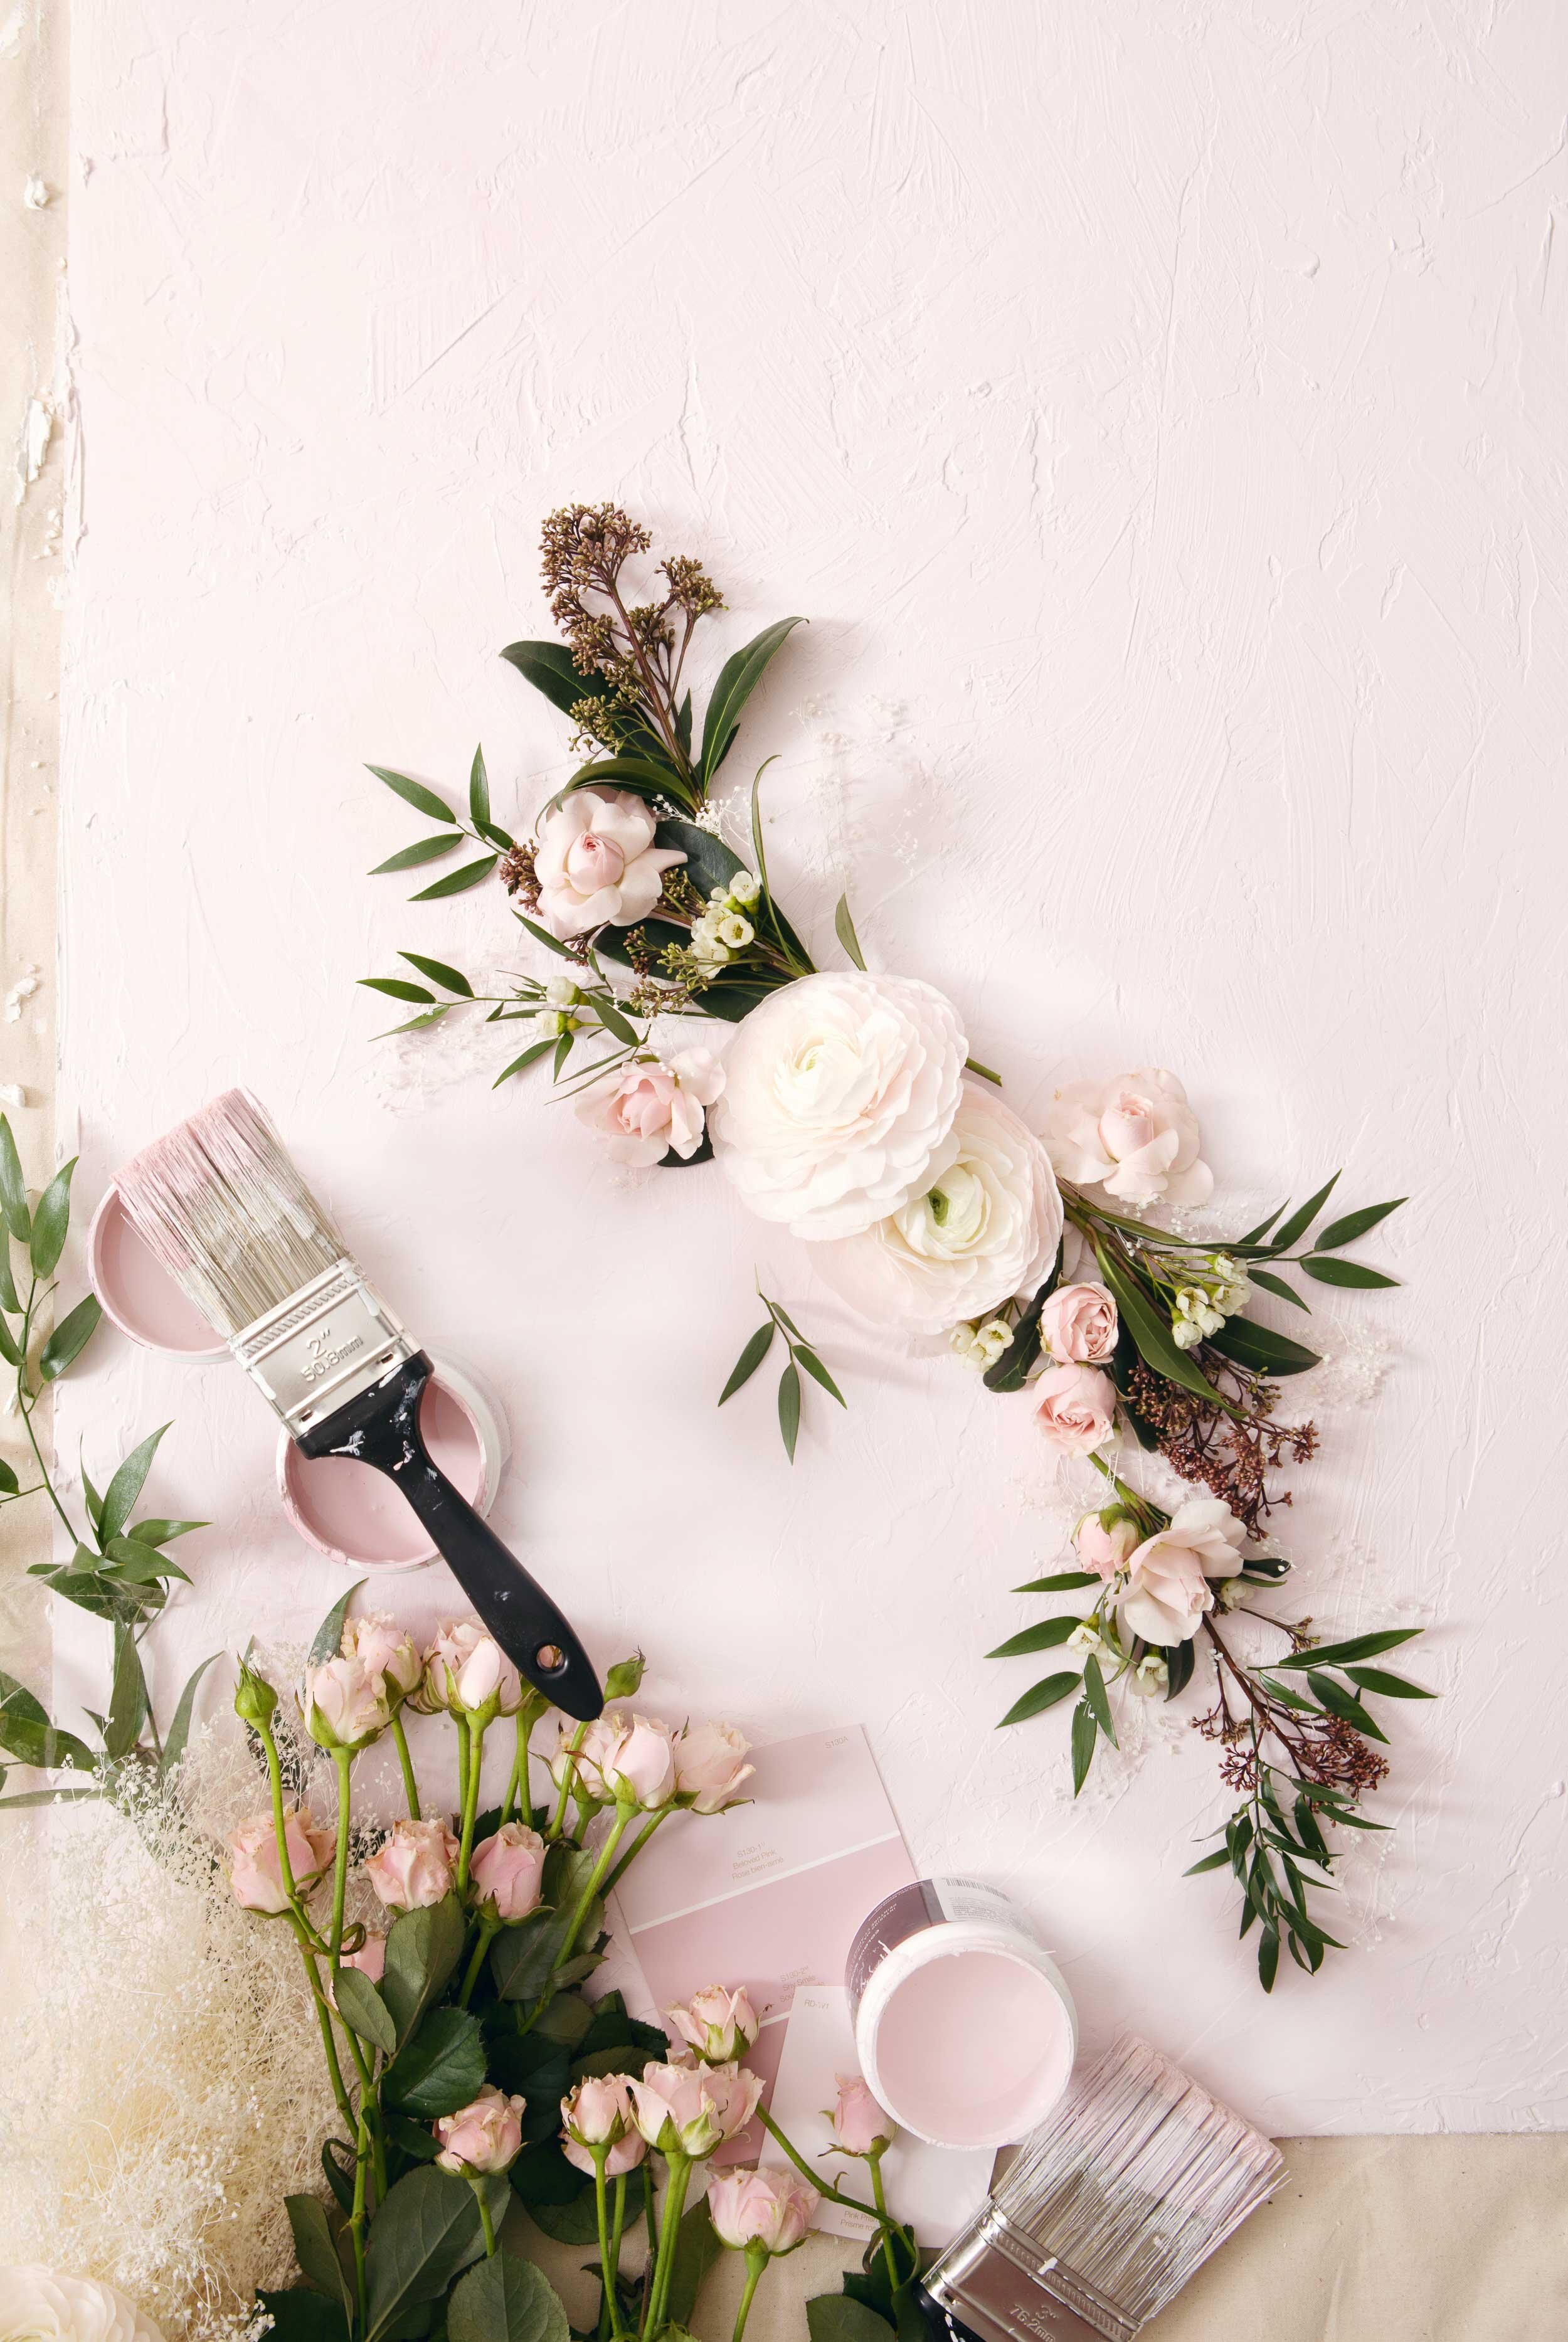
Supplies
Hardboard — This is one of my go-to backdrop supplies, as it comes in a variety of sizes and is under $5 for my most-used size, 2'x4', which is what we're using here. The 2'x2' is also a great option if you're looking for a smaller surface, making it easy to store and transport as well.
Spackling — The one I used goes on pink and dries white (which I must admit, was totally a selling feature for me), and the midsize 946 mL bucket was the perfect amount.
Plastic Putty Knife — They come in a few sizes, and I usually like to have options on hand for different areas and desired effects.
Paint Samples — Pick out 2-3 colours of your choice in various shades of the same colour family and have them mixed in the small paint samples, with a matte finish. Instant brand colours, and under $5!
Brush (2” or 3”)
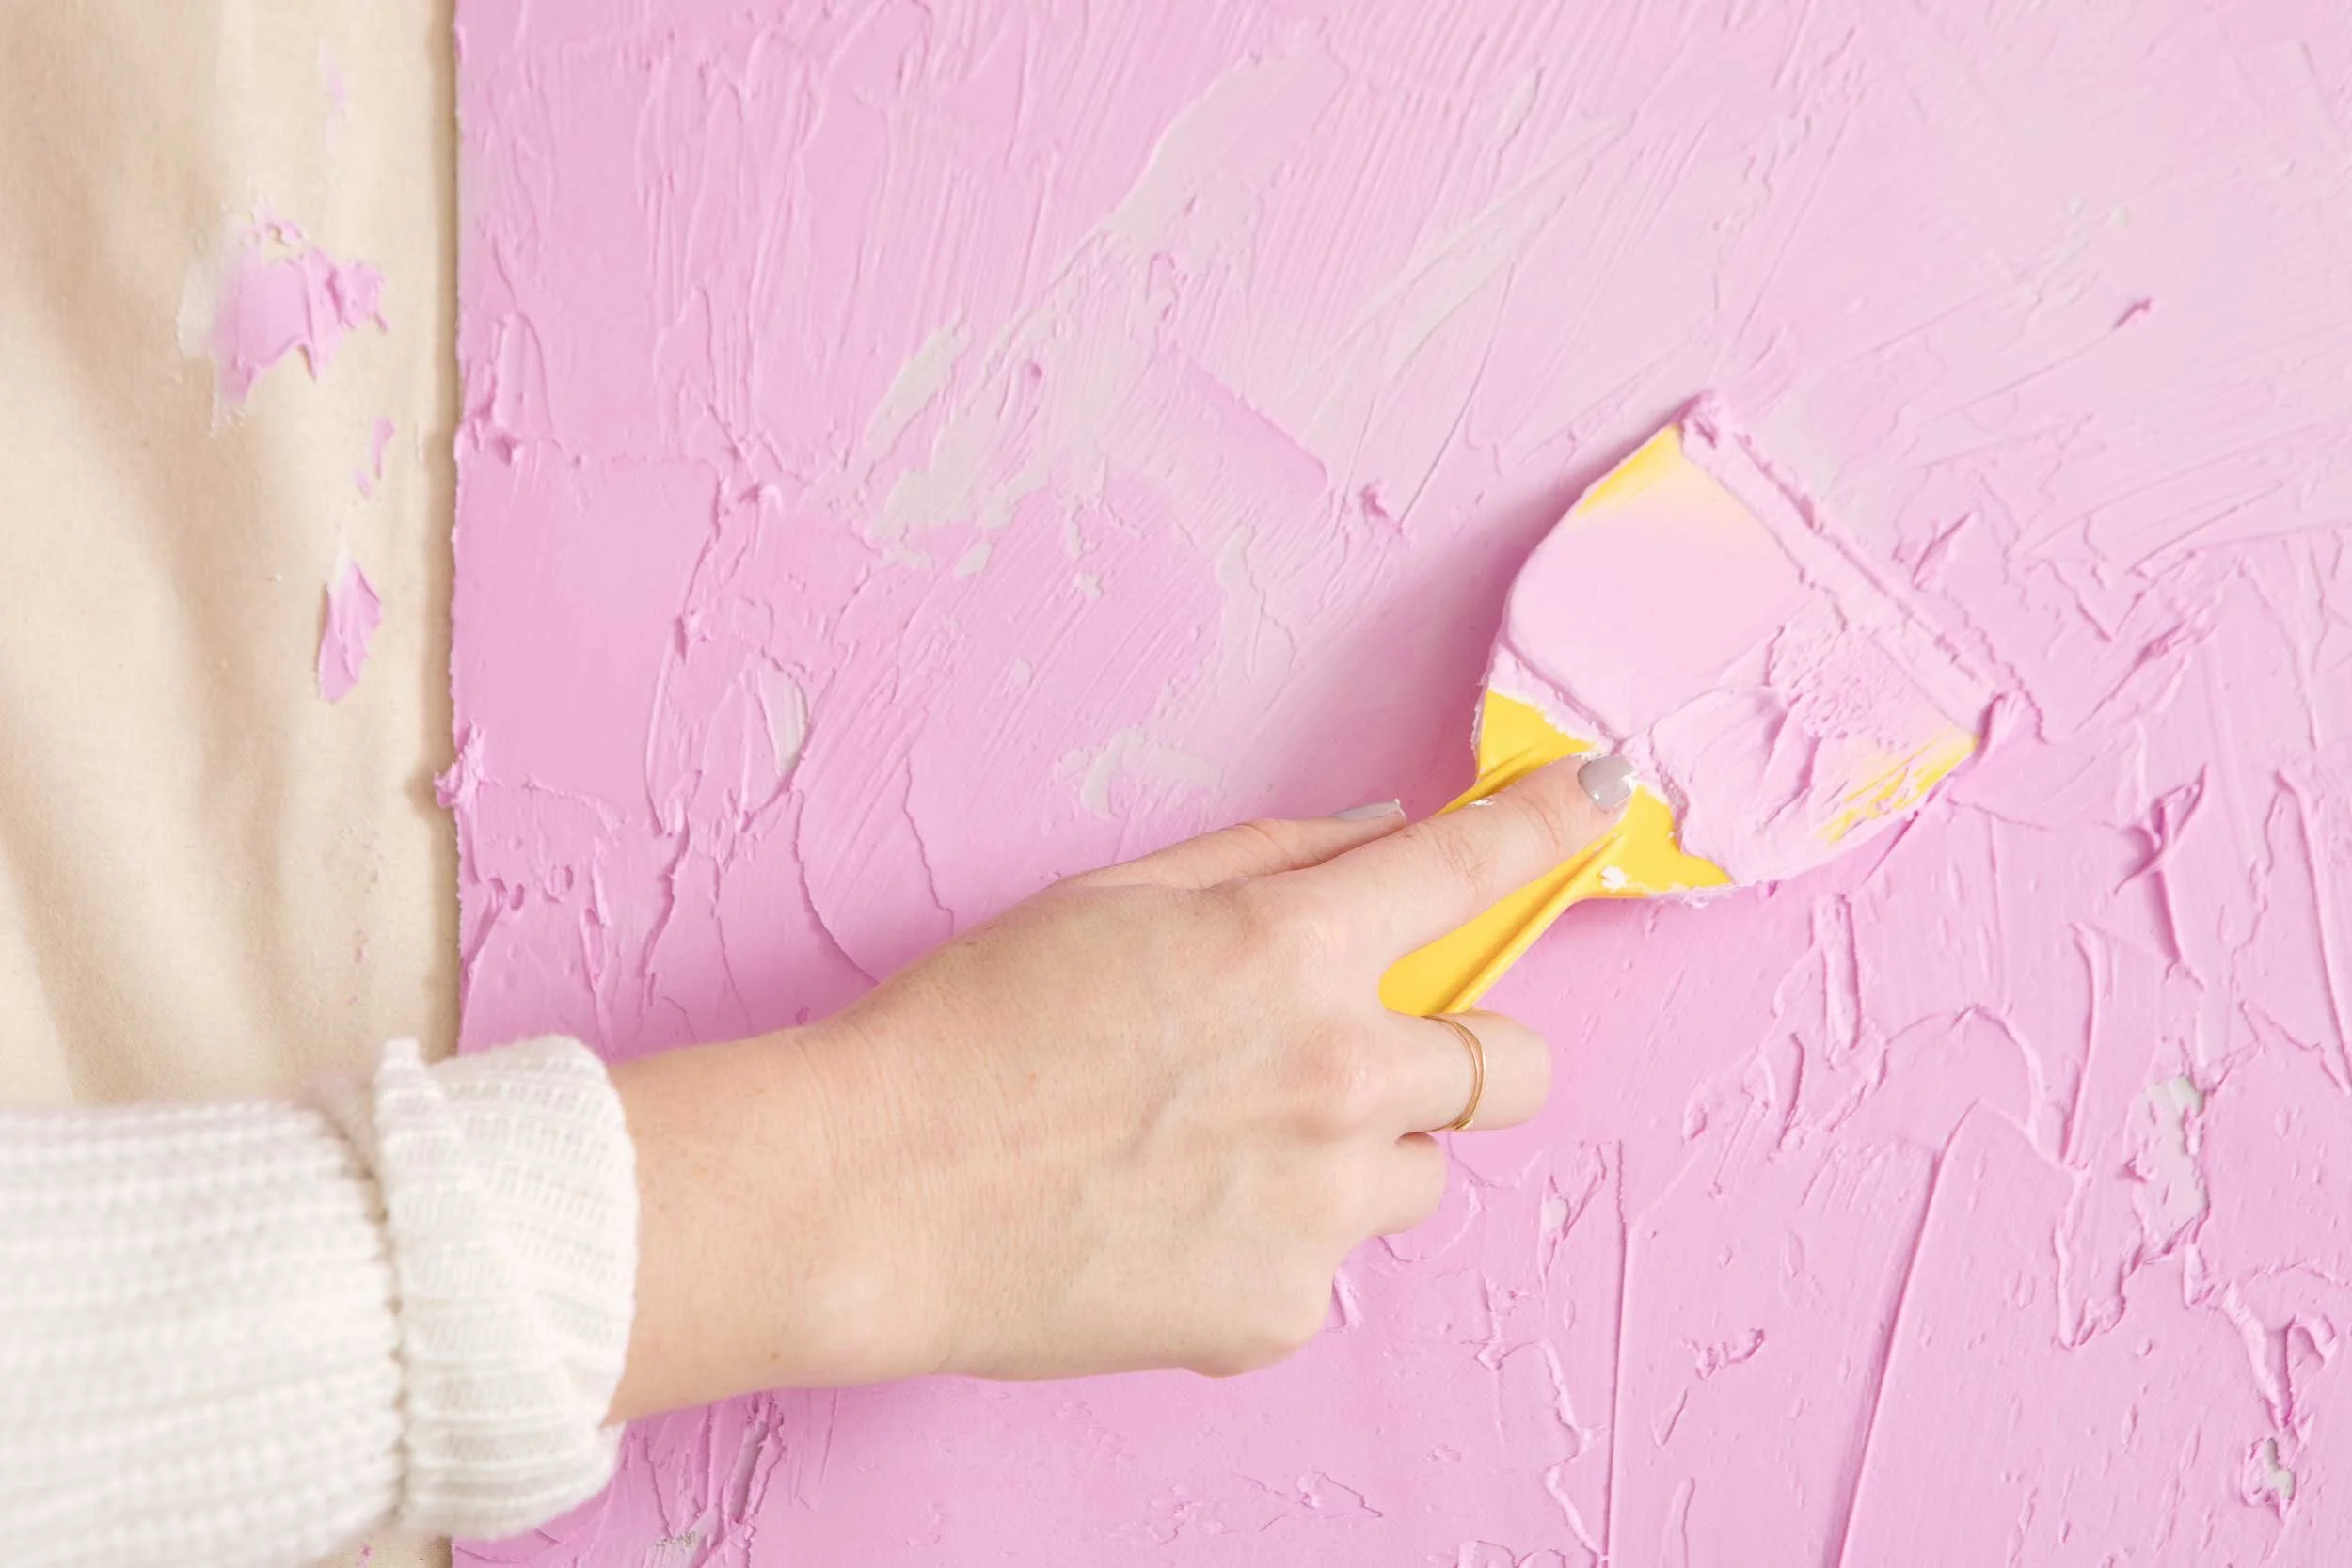
Step No.1 — Apply the spackling to the board
Using the putty knife, start in the centre and work your way out towards the edges, smoothing the spackling as you go. Pay attention to the length and direction of your strokes, which will dictate the finished texture of your board. Embrace the imperfections, as it will only add more character, and play with the compound until you're happy with the finished texture.
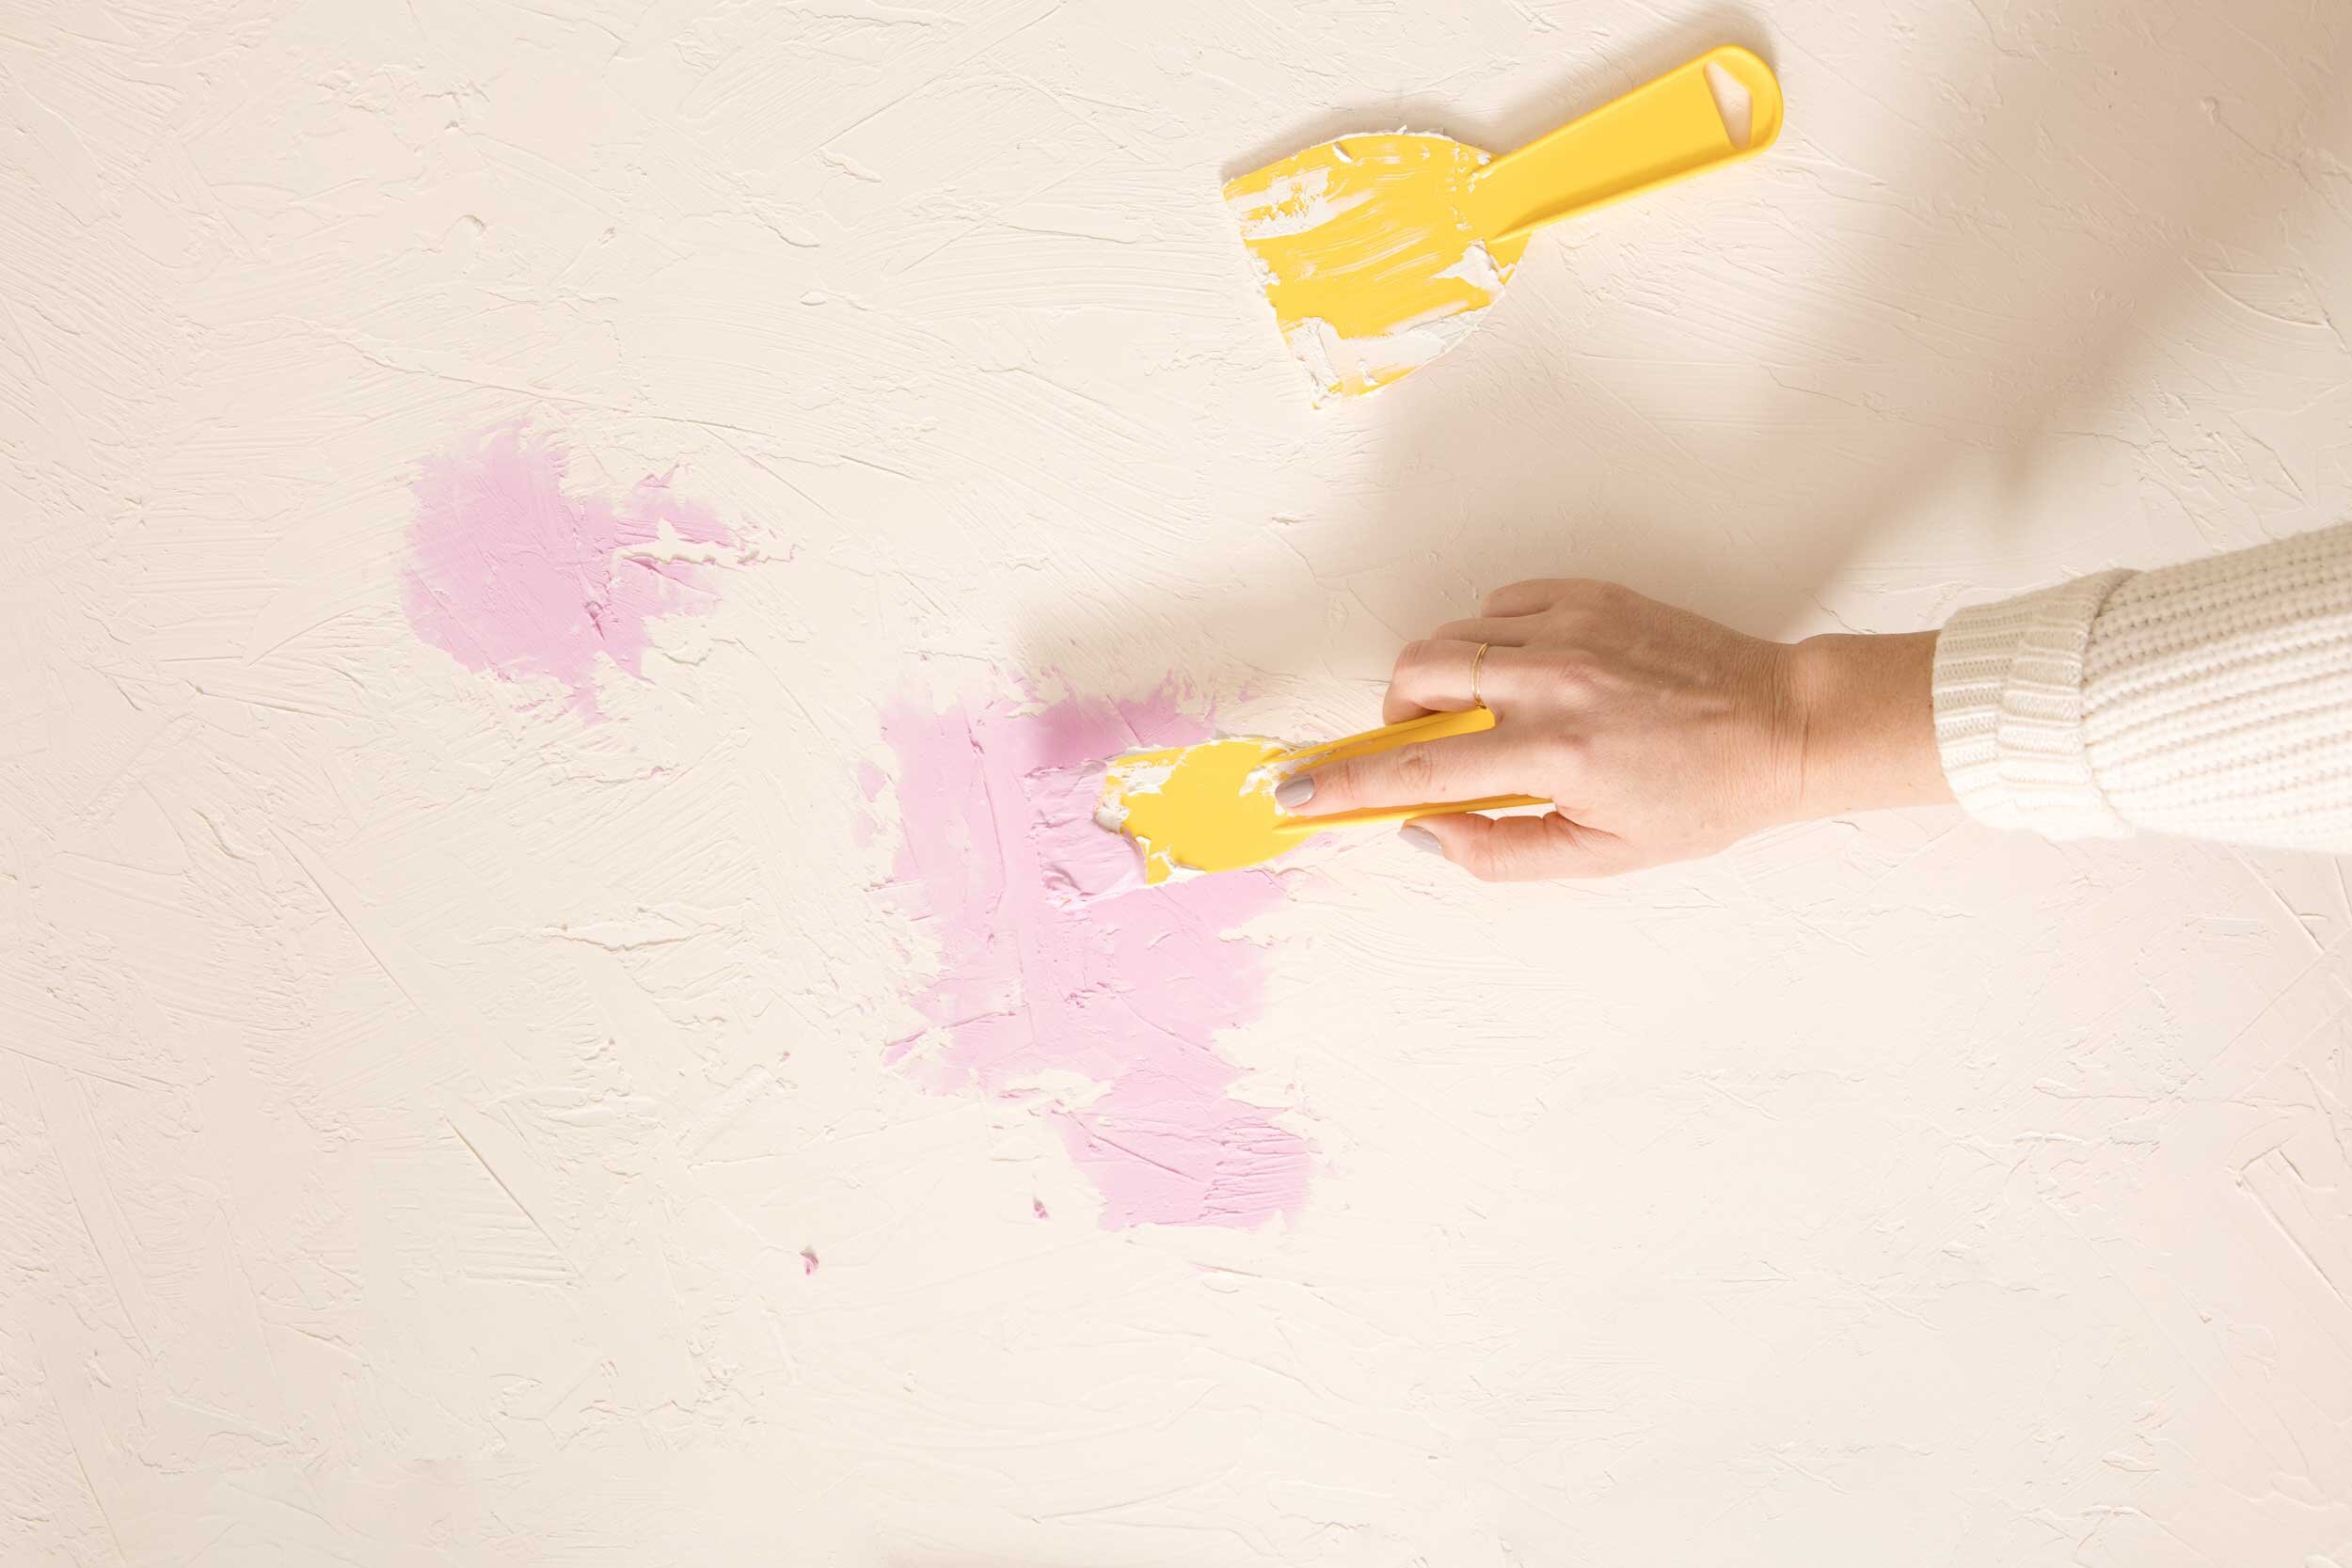
Let the sparkling fully dry — and watch it turn from pink to white!


Step No.2 — Touch up any problem areas
Once it's dry, if you notice any areas that you're not quite happy with, go back in and add a few more spreads of the spackling until you achieve the texture you're after.
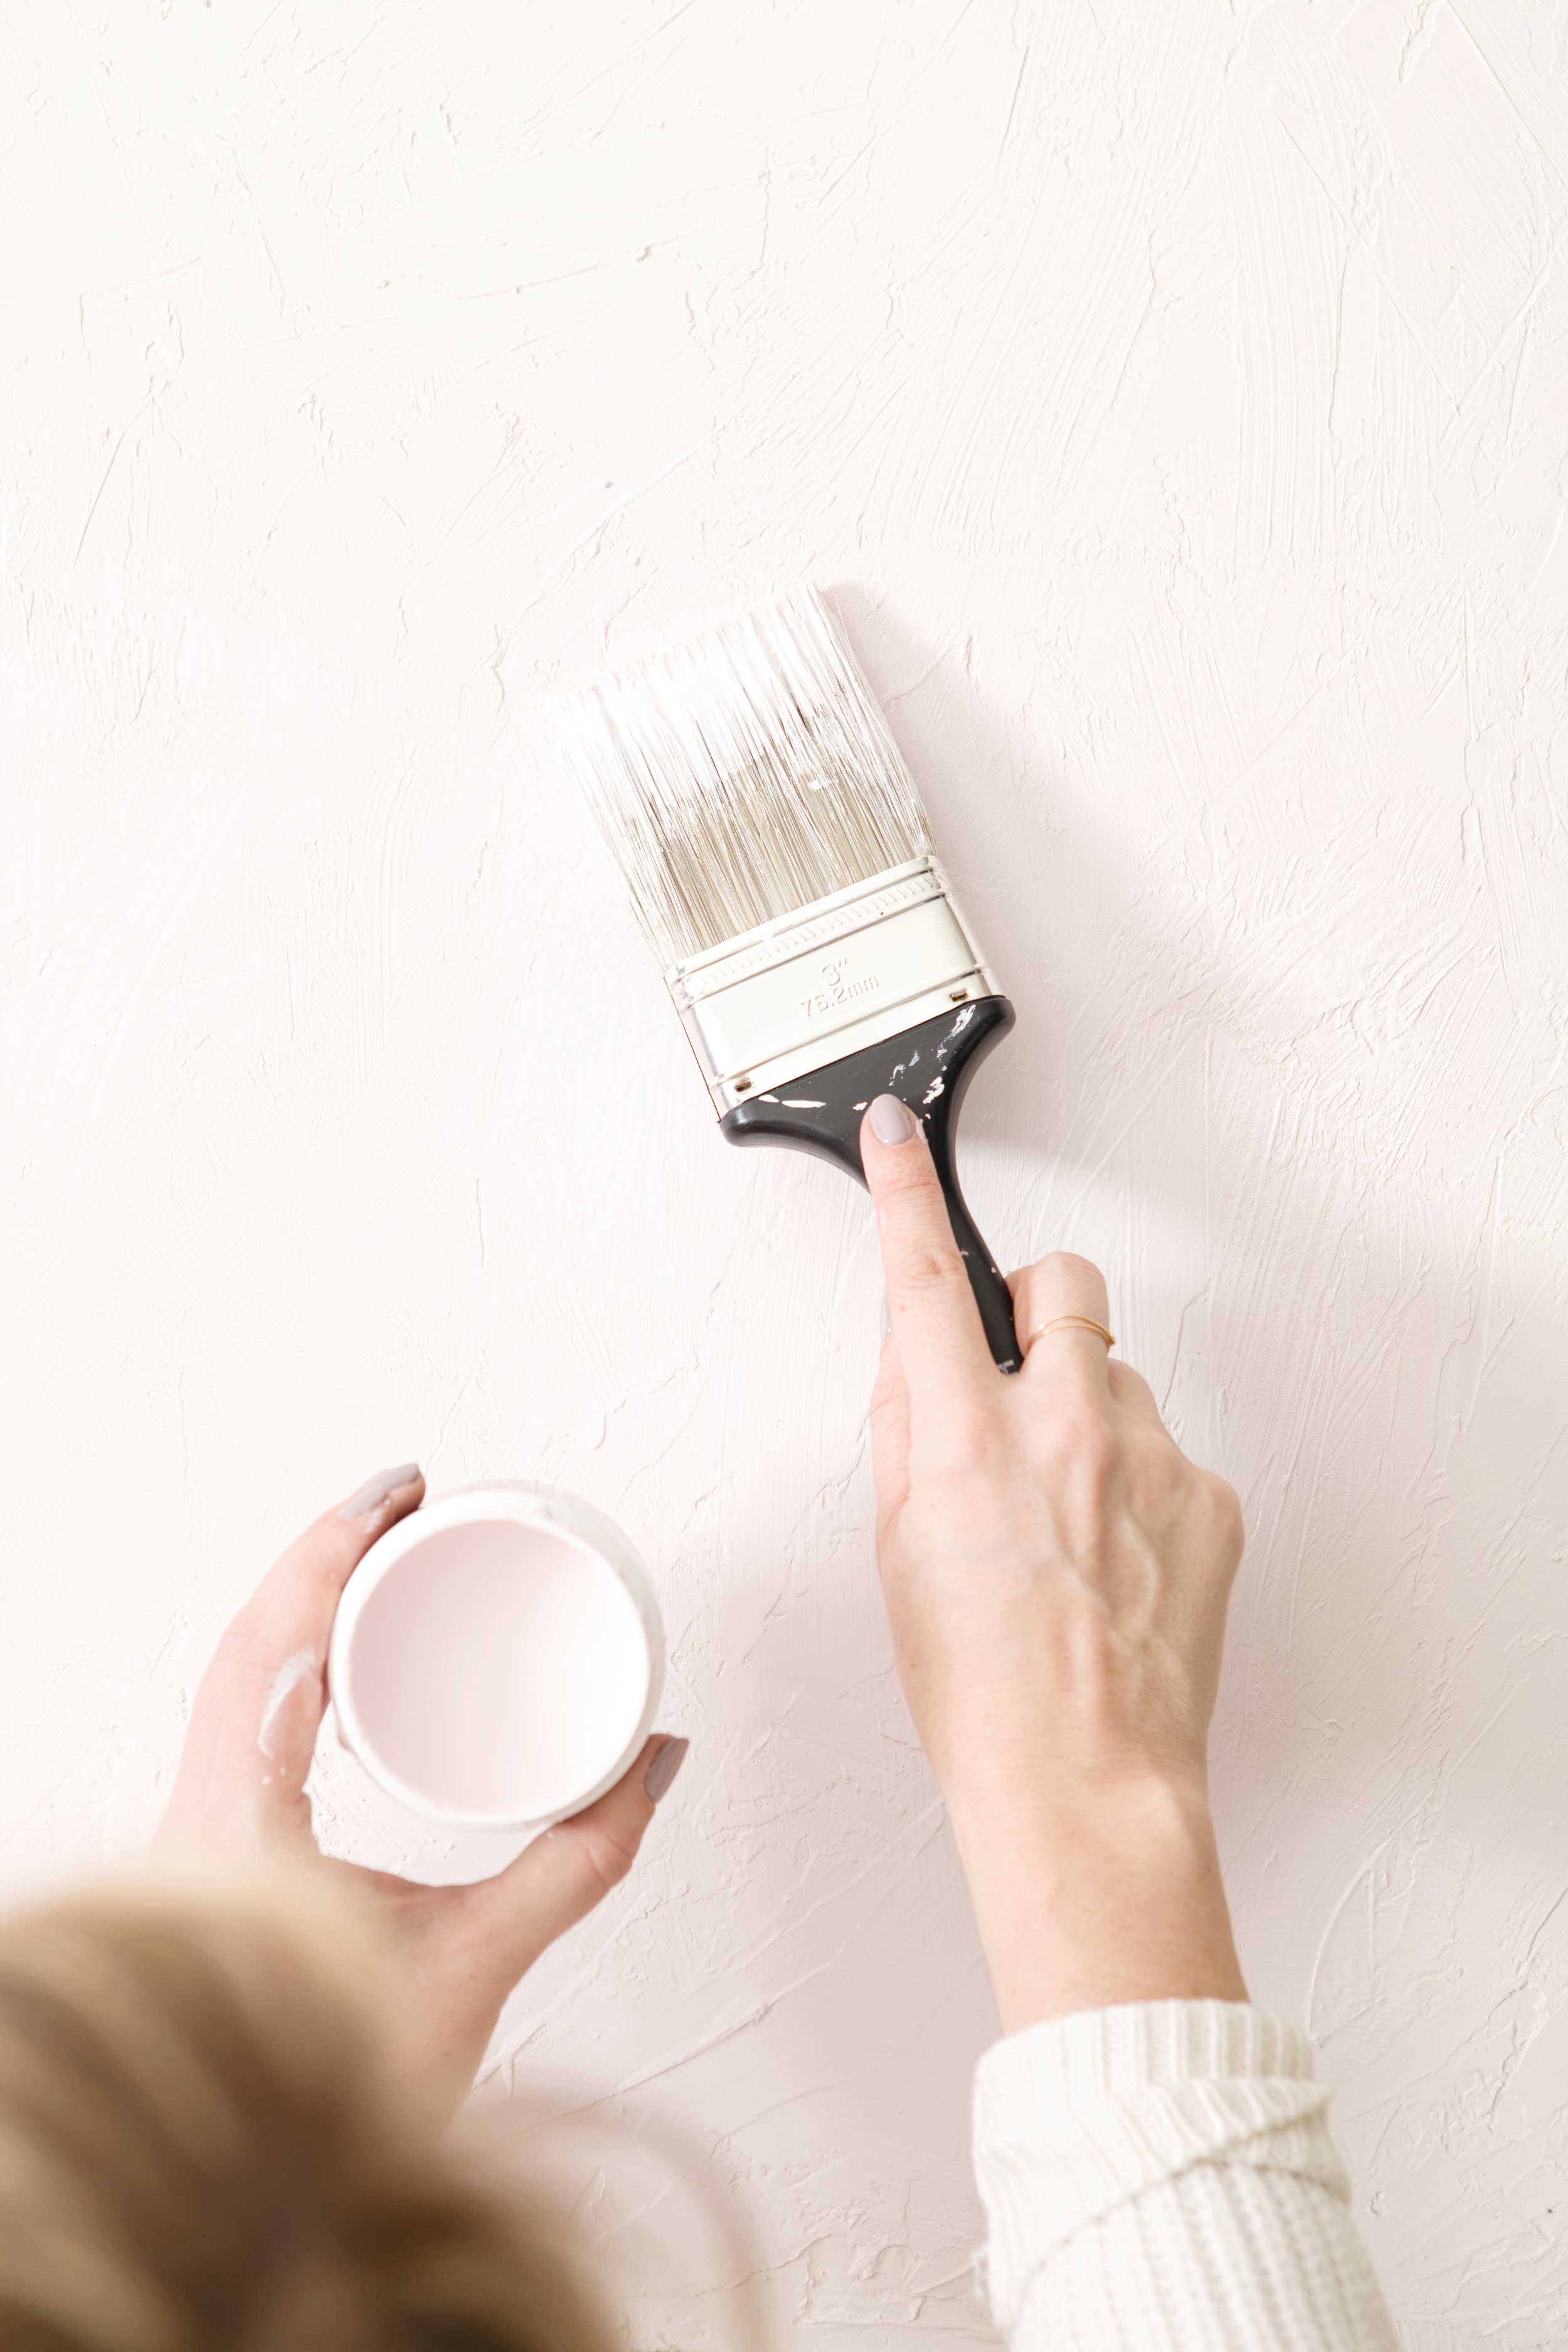
Step No.3 — Paint your textured backdrop
Now that it's fully dry, you're ready to paint the surface. Open up your sample paint pots and start with the base colour, spreading it all over the board. Because the board is textured, you don't have to be too precious with the coverage, but as always, it is important to pay attention to any lingering brushstrokes.
I opted for a light, dusty pink palette, and my base colour was an pink toned off-white. Because it wasn't that far off from the natural colour of the dried spackling, and I knew I wouldn't mind if a bit of the base showed through, I painted in really light handed stroked and didn't worry too much about missing small areas, as long as it was blended.

Once my base colour was on (but before it dries!) I went in with the smaller brush and added some random sections with my darker two colours, with the darkest colour in the centre and then adding the medium tone to the edges and blending it outwards. You could just leave it with the one colour, but I really wanted to create even more dimension to the board with a subtle gradient.


And just like, we now have another DIY styling backdrop to add to our kit, thanks to a few inexpensive supplies and a few hours of free time.
There are so many options with the colour combinations and the texture to play with, so I'd suggest having some fun with it and seeing what you can come with for your own styling projects.


This post is sponsored by The Home Depot Canada. All expressed opinions and experiences are my own words.