
#PASTELCRAFTCLUB // Watercolour 101
Alyssa and I are both massive fans of watercolour art work, but neither of us have ever really been able to perfect it on our own. Don’t get me wrong – we’ve tried! That said I’ve never really ended up with anything I actually like all that much.
Luckily, Alyssa has an artist for a roommate.
Johanna (aka @blousesandhouses on Instagram) has been drawing and painting all her life, and it’s truly a treat to watch the magic come out of her paintbrushes. She’s always working on something new, perfecting a difficult technique, or painting over something old to master something different. She’s so truly talented, but since creating comes so easily to her I always assumed it was something us “normal” people wouldn’t be able to replicate. When Johanna offered to do a watercolour 101 tutorial with us for the #pastelcraftclub I was extremely doubtful that I’d actually learn anything, but decided to give it a shot.
It turns out watercolour painting is actually a fairly forgiving medium, and as long as you're able to draw a semi decent shape from a reference photo and stick to a sort of "paint by number" system, you're likely to end up with something cute! Johanna picked a super simple gem shape and shared all of her favourite texture techniques with us, and by the end of the lesson Paige and I were both pretty confident we could make gems of our own (though Johanna's actual super intricate crystal paintings are still a bit out of our skill set!)


Supplies
A simple reference image
Watercolour paint
Cold pressed watercolour paper
Watercolour brushes
Toothbrush or old paintbrush
Pencil
Ruler
Salt
Iridescent watercolour medium (optional)
Instructions
To start:
If you don’t feel confident in your abilities to draw your crystal shape, don’t worry! There’s a trick to help you!

Print your reference image to the size you’d like you’re final painting to be, on regular bond paper.
On the back of the image, where the points are – colour a fine even layer of graphite.
Tape the reference image graphite side down onto your watercolour paper.
Using a sharp pencil make indents where the points occur onto of the reference image, this pressure causes the graphite underneath to transfer. Now peel up the image and use a ruler to connect the dots! Don’t worry about pencil marks you can erase them at the very end.

Now that you have your basic shape drawn out:
You’ll need to identify 3-4 values of your shape: Darkest to Pure White.
In watercolour, pure white is always represented by the paper itself, not white paint. To create values with watercolour start with the pure pigment whether its from a tube or a palette. Pure pigment mixed with a bit of water will be your darkest value, add more and more water to create the lighter values. Unlike paint, water is the only thing added to watercolour pigments to lighten them – not white pigment! Use a test piece of watercolour paper to make sure you’re happy with your value scale.

Identify your values in your reference image, I recommend taping off or using Masking Fluid (Frisket) on the sections you wish to leave pure white.
Now move on to your darkest valued sections. Use tape around the outside edges of the section and lay down a wash of the darkest value. Repeat on any other dark sections and allow to dry.

I used a technique called Wet on Wet for my mid-values. Paint in with pure clean water the section you are working in – making it damp with a slight puddling effect, make sure to stay inside the lines. While the paper is quite damp dip the tip of your brush into the dark value and place the pigment into the wet paper – you’ll see the pigment quickly be sucked up by the water and spread across the area. Move the brush around adding more pigment and water until you see the desired effect, allow to dry completely.

Another technique that lends itself well to painting gemstones & minerals is the salt technique! Lay down an area of quite damp colour (one of your middle values) wait a few seconds and sprinkle a tiny bit of salt over the area – Each crystal of salt chases away the pigment to make a lighter area beneath it. Allow to dry completely before brushing away the salt.

The last technique can be used to fill in the mid-light values – Splattering! Again, tape off the outer layers of the section you’d like to fill. I use pieces of paper in addition to make sure splatter stays off the rest of the painting. Dip an older paintbrush or old toothbrush in your darkest value, Use your fingers to flick the paint onto the painting – Try experimenting on your test paper first! Continue until you’re happy with the value.
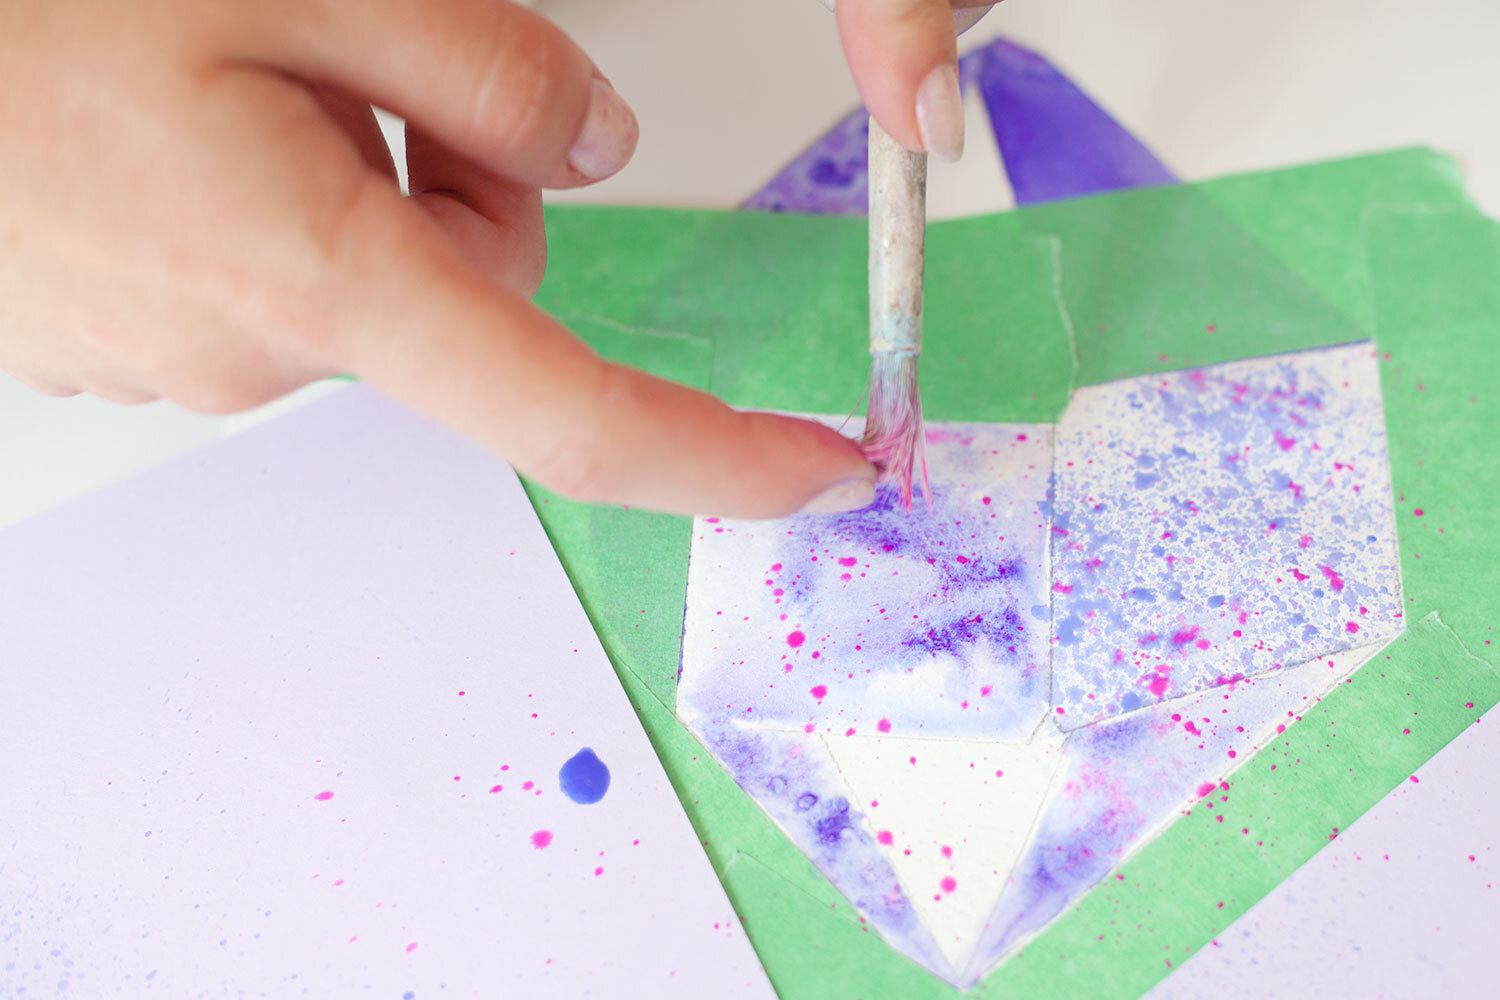

You can continue this splatter technique by taping off different areas of your painting and layering splatter on top of other techniques. You can also start to add other colours this way, I used a hot pink on the bottom half here. Layer as much as you’d like until you’re happy with the outcome.
Finishing details:
When everything is dry remove all the tape, use an eraser to erase any visible graphite lines and brush away the salt. With a small watercolour brush, use your darkest value to straighten up and lines and add details.
I also used an Iridescent Watercolour Medium over the highlighted parts to catch the light.

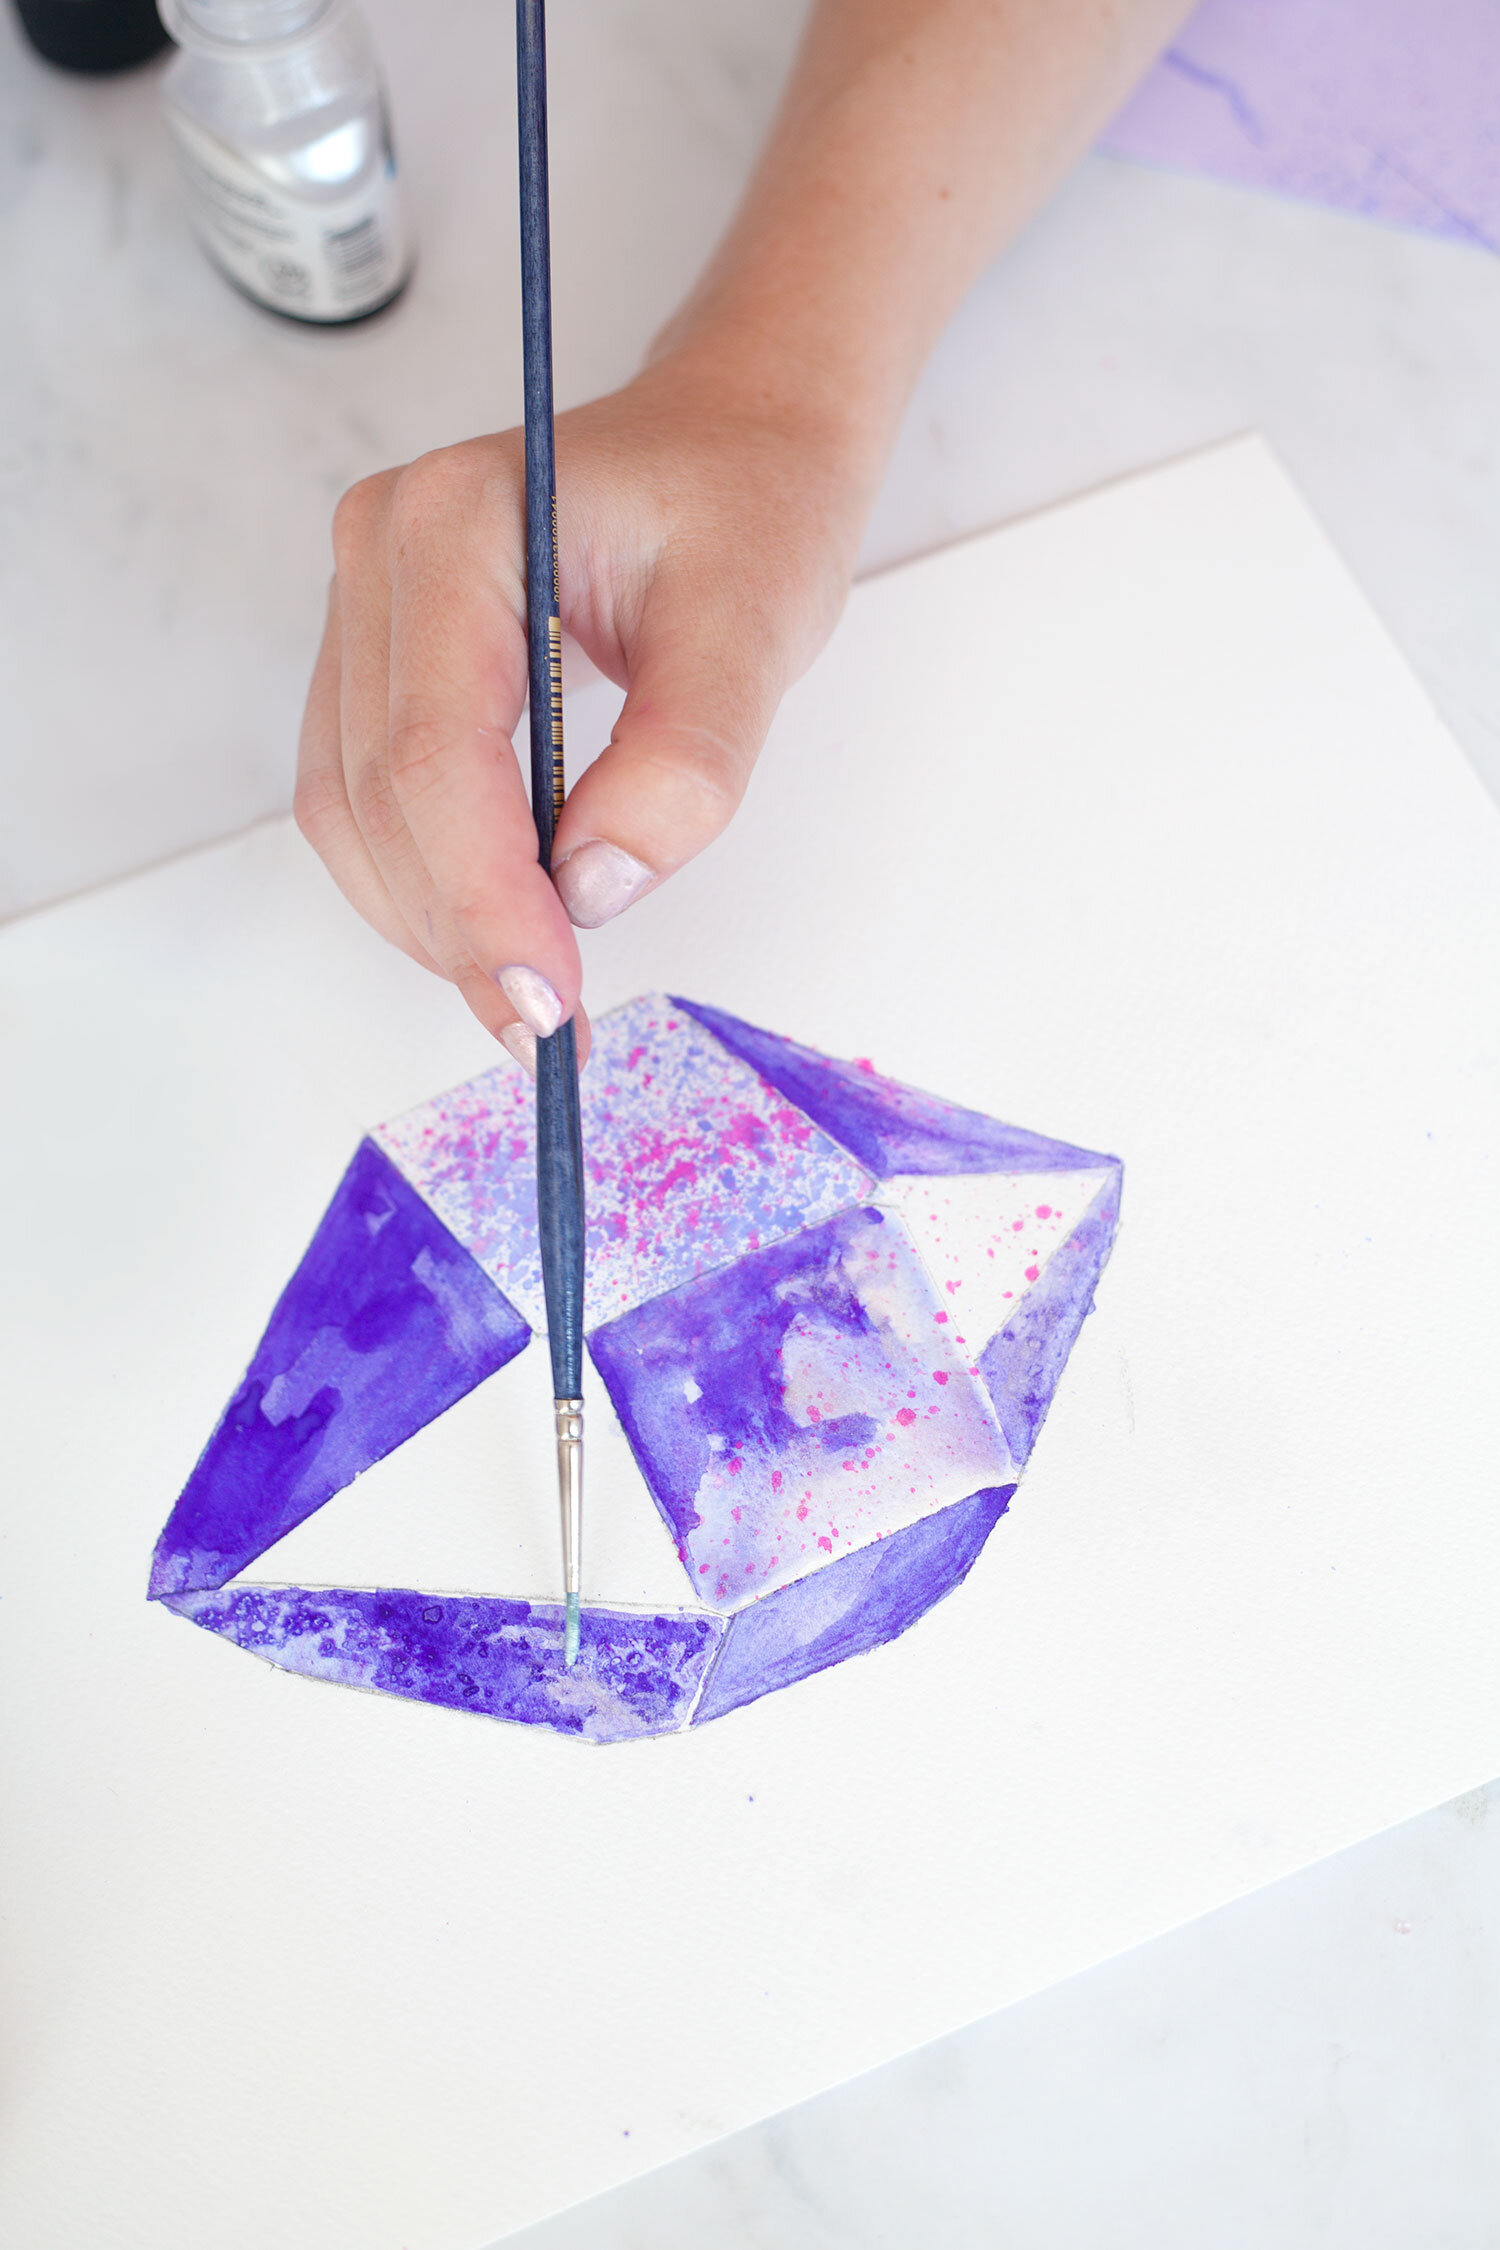

Ta-Da! You made a watercolour painting!
You can check out Johanna’s work here